Wednesday, June 17, 2020
Tuesday, May 12, 2020
Sketchup Project No. 2. (Rubik's Cube)
This Rubik's Cube was made by your's truly for this week's project. The colors have been sufficiently scrambled, yes? For all you guys know, the stickers were peeled off and stuck back on by some toddler. That's not a guarantee but it may be a possibility. May be.
A bigger Rubik's Cube is coming soon.
UPDATE: I'd like to introduce you to the Big One. The name speaks for itself.
UPDATE 2: Introducing the newest addition to the Cube™️ brand of products... Cube Jr.!
A bigger Rubik's Cube is coming soon.
UPDATE: I'd like to introduce you to the Big One. The name speaks for itself.
UPDATE 2: Introducing the newest addition to the Cube™️ brand of products... Cube Jr.!
Friday, May 8, 2020
Sketchup Project #1: Part 1: Tiles
Tuesday, April 14, 2020
Codeacademy #1
Other Lesson I did: Simple coding (booleans, simple calculators and logic gates)
I also learned about patterns!!! I will learn more later. :)
Wednesday, April 1, 2020
Response
Trevor Jansen - Block A - Grade 12 Information Technology
1. I am well enough to continue work.
2. I have the appropriate equipment to continue working on this course.
Friday, February 28, 2020
Final Abomination: Creature Feature #5
Whatever This Is
The final project is a combination of all I've done, so I made it as dark and sinister as possible, while still showing off the creature in all its... "glory". Here, it can be seen breaking out of its cell, because horrific abominations tend to do that.
The creature itself is a combination of a goldfish, water flea, stork, and a cow. It's half cow because it has a cow pattern on it, obviously.
Gallery
Like before, here's a gallery of all the parts I used to make this... "art?" Could this be considered art?
Many of the pictures here were recolored and otherwise altered to add consistency to the beast seen above.
Thursday, February 27, 2020
A Horrible Abomination (Creature Feature #4?)
Parts
A creature needs parts, luckily, I have parts. Lots of them. I have lots of animal parts to craft what only the most delusional person would call "the ultimate life form." Well, it has the body of a penguin, the legs of a mosquito, the head of a tardigrade, and the compound eyes of a fly. It'd probably be an apex predator just waiting for its prey in the deep, dark sewers of whatever the hell this place is supposed to be. I suppose the masking tool is definitely the creature-crafter's best friend, for many reasons, of course.
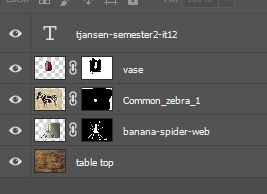
I used the dodge and burn tools to make the scene more sinister looking, and to further show that this thing was not natural in any way, and makes it look like it belongs in a horror film or something.
I had to compact the layers down to move the monster around, just to get it in right position. This is why the monster is just one layer; the part layers were merged for this exact purpose.
Finally, I added text just so people know that it was I who brewed this monstrosity. Y'know, because even though this thing is just an image, it's still a nightmarish critter that should probably be killed in a fire. Seriously.
Gallery
Here's the gallery of everything I used to create this awful violations of ethnics, including the grody sewers that contain this... thing.
Wednesday, February 26, 2020
Second Texture Project
The Start
The first thing I had to do was find images for this project, which I did! They can be found below.
The zebra's pattern was used for the spider's head, and the vase was used to recolor its abdomen. Using the masking tools I was able to add transparency to everything, as well.
Background
The background I decided on was a table-top which I darkened using the dodge tool. The burn tool was used on the spider to give it extra shading.Finished
The final result and layers can be seen here. I didn't actually need to do much in this aspect.
Friday, February 21, 2020
Merging Textures to Create More Oddities (via Photoshop)
Here's the next project I did, where you overlay the skin of wild animals on top of an entirely different animal, so basically, it's taxidermy... BUT DIGITAL!!!
Unlike the other projects, I didn't have to move much around, meaning I wasn't forced to merge layers, I guess that's cool.
Here's the final product. Honestly not much to talk about but at least it's not an abomination like the previous two were.
Thursday, February 13, 2020
The Abomination #3
What happens when mix the head of a paper wasp, the body of a platypus, the legs of a Canadian goose, and the tail of a ferret?
Well you get THIS
By using the masking tool, I was able to cut out the animals from their backgrounds, and cutting out their limbs in the process. The dodge and burn tools were used to create lighting for the creature, and then I mixed all together to create this... thing. I decided to put this thing in the abandoned hallway of what could be described as a genetic breeding center, as this hideous abortion of life should not be put out in the open.
The layers of animals were mixed together so I could move the whole thing around easier, but I thought this looked cool enough as it is. I also added an extra touch to the background.
Overall, this is one creepy critter.
Monday, February 10, 2020
Animal Morph Project Part 2
The creature pictured above is a blend of a giraffe, cassowary, and a snapping turtle. It has been titled the "Southern Abomination" as it is both a freak of nature AND its components are native to South America. Keep in note that the head of the turtle made a good tail for the beast.
I learnt about the dodge and burn tools here, and started using them to adjust the lighting on both the background and the creature itself. I also used a masking tool to remove the background of the original cassowary, drafting the other creatures onto it, and using the fill tool to replace its head with the giraffe's. I had to use an eraser to remove the other animals' backgrounds.
Friday, February 7, 2020
Crocofrog Photoshop Morphing project
I started by recoloring the frog to make it more alien-looking. By filling in the head with a content-aware fill tool, the crocodile was added. The background of the frog was hidden by use of a layer mask fitted over the body.
I erased the crocodile's background, leaving only the head of the beast. It was recolored to fit in with the rest of the creature.
The layer amount was quite simple in comparison to everything else that was done. ( I have named the layers as asked by the teacher. )
Wednesday, February 5, 2020
Tutorial 2: Photoshop Effects Search
TITLE:Hybrid Animal How To in Photoshop CC 2018 |
---|
URL:
https://www.youtube.com/watch?v=_HAraTLRM7U |
TITLE:
How to change the color/texture of an object in Photoshop! | Photoshop Simple Tutorial
|
---|
URL:
https://www.youtube.com/watch?v=M-pQsoQ09ks
|
Monday, February 3, 2020
Subscribe to:
Posts (Atom)